Wednesday, March 9, 2011

Twisted Nickel quilt

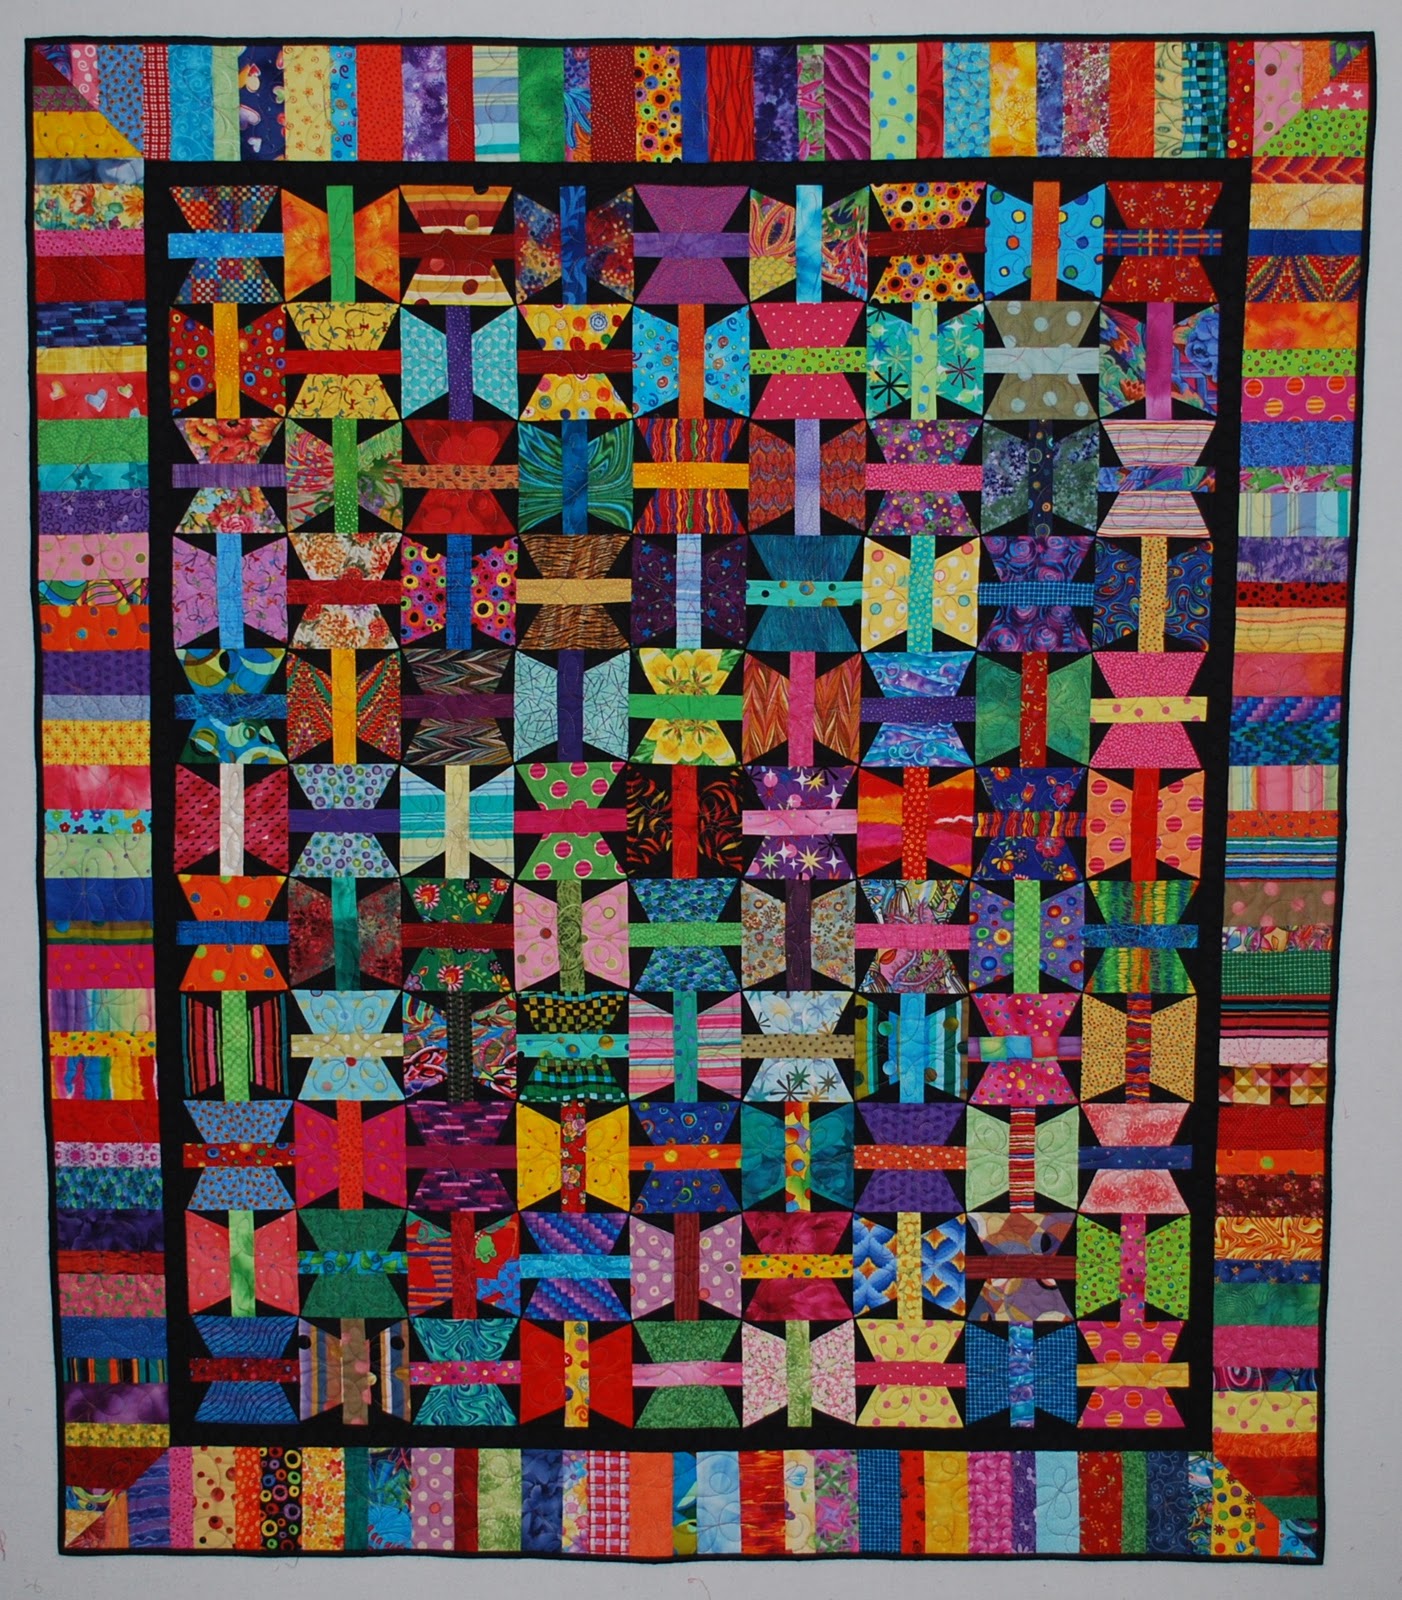
The block in this quilt is a variation of a traditional block called Washington's Puzzle. There are a few different ways to make this block.  You can cut nine individual pieces for each block and sew them together or you can paper piece the block. I chose to make nine patch blocks and then made angled cuts to form a new square.  A consequence of this construction method is leftover pieces from trimming the blocks and bias edges on the outside edges of the block.  Don't see a way to get around having bias edges somewhere.  I hope to design a way to use the leftover pieces in another quilt.  Do you see the secondary pattern of flowers that developed by rotating the blocks?  There's an idea floating around in my head about making the flowers more predominate in another quilt. 


This quilt has not been quilted yet.  Life beyond quilting has been very busy.  My husband bowled in the State bowling tournament this weekend and our house is finally on the market with my sewing area being neat and tidy but almost unusable.  I have to get so much stuff out and put it back every time I sew.  What a pain!

On another note, we were fortunate to have my husband's oldest daughter and her two youngest children stay with us for a few days.  They are moving from Illinois to Denver Colorado and were heading into bad weather so stopped and stayed with us until today.  It was good to see them since they will live much farther away now. 

There won't be a post next week because my husband and I are off to the AQS quilt show in Lancaster Pennsylvania.  We are very excited for the trip because two of his daughters live about an hour from Lancaster so we plan to spend time with them and six of our grandchildren.  I'm ready for a break from this challenge and hope to come back refreshed and ready to sew.  I have a lot of catching up to do to keep on track to make 55 quilts in a year.

Sunday, February 27, 2011

Fluttering Around

Finally done!!  Here's the butterfly quilt that I gave you a sneak peek of last time.


As you can see, this quilt has way more pieces than any of the quilts I have previously posted.  I used 5 inch squares and some smaller scraps to make the 99 butterfly blocks and 44 blocks in the border. It's a great way to use a bunch of scraps.  The time it took to complete it put me even more off track of my goal of 55 quilts in in my 55th year.  I am 8 quilts behind already!  I call this quilt Fluttering Around for two reasons-the block looks like butterflies to me and it describes me right now.  Since I have started this challenge, it seems like I have been busier than ever.  One major thing that has been happening lately is that we are getting our house ready to sell.  We put in new carpet this week and that meant moving 4 bedrooms and 1 living room of furniture and then putting it all back.  Very exhausting.  A new master bath floor goes in tomorrow morning and then maybe we will have some semblance of normal for awhile.  However, having our house on the market means I can't take over half of it with my quilting.  I have to get really organized and put everything away so that the house shows well.  That is going to be very hard.

Though I think this block looks like butterflies, it is my interpretation of the Beggar's Block.  The Beggar's Block is a nine patch block the has a solid square in the center.  My block has a butterfly in the center.
It took a lot of trial and error to figure out how I really wanted to construct this quilt. The good news is that I came up with a much easier way to make it as I was going through the design process.  I first starting making the blocks using paper piecing and then decided to eliminate that whole process.  I made the borders as long strips (which I hate to do) but figured out how to not do that in the future.  I also came up with a super simple way to miter the corners.  I call it a fake miter.  If somebody else has figured this out, I certainly haven't seen it.  Here's a quick tutorial-


The border is made up of these blocks.  I needed 2 blocks for each corner-1 for the top border and 1 for the side border, for example. 


I placed the 2 blocks right side together, drew a line from corner to corner and sewed on the line.
I then cut 1/4" from the sewn line to get my seam.  I pressed it open and voila, a mitered corner.

The quilting on this quilt is a custom design by Linda of L&R Designs.  I think it's the perfect design to emphasize the butterfly block.  The variegated thread is a perfect choice too.

Sunday, February 13, 2011

Mug rugs

As I was deciding how to design my mug rugs for a mug rug swap that I am participating in, I decided that I should use blocks from quilts that are in the works.  So here's a sneak peek.  This first mug rug uses the main block from the quilt that will be posted next week.  I can hardly wait for you to see that quilt.  It's one of my favorites! 


As I was about to start on mug rug #2 (we have to swap 2), I received my mug rugs from my swap partner (below).  Aren't they creative? 


She even made them completely reversible with designs on both sides.  I hadn't really thought that far ahead but decided to make my second one with designs on both sides also. 


I used raw edge applique on both the flower and the butterfly designs.  The raw edges will fray a little with use and washing and give it a little more character.  That's large rickrack in the center of the butterfly, in case you were wondering.  Can you tell I was dreaming about spring when I made these?

What's a mug rug you ask?  It's a place to put your mug and your snack.  For the swap, we made them 6"X10".  Kind of a double size coaster.  These are a great little project to use up some scraps.  Great gift idea too.  Oh yeah, I did use 5" squares for the the pieced butterfly block as well as the flower and butterfly appliques.

Sunday, February 6, 2011

Ziggity Zag quilt

For my birthday this year, a quilting friend gave me a June Tailor Perfect Half and Quarter Square Triangles Ruler.  I decided to try it out on a stack of black and white print nickel squares(5") that I had sitting around and Ziggity Zag was born.  This little gadget helps you make very accurate half square and quarter square triangles.  It's a slotted ruler that you use with your rotary cutter.  Here's a video that shows you how to use it. 


I started this quilt by creating the border and thinking that I would use some arrangement of half square triangles in the center but when I found this fat quarter in my stash, I decided to use it instead.  I thought it would make a nice wall hanging to go with the quilt shown on the right that I made a few years ago.  Many of the scraps from the first quilt are used in the wall hanging and I even had enough leftover binding from the first quilt to use on the smaller one!

This would be a good pattern to use if you have a fabric that you just don't want to cut up.  Just use it in the center! I used a fat quarter but you could really use any size fabric and adjust your border accordingly.

The zigzag effect is easy to achieve.  Here's a short tutorial-

For one block, you will need:

2 black 5" squares and 2 white 5" squares

Using one white square and one black square, make 2 half square triangles by your preferred method. Repeat for the other set of squares.  You will have 4 blocks that measure 4 1/2" each.  Arrange them as shown below and sew.

 
The quilting used on this quilt was a custom design by Linda of L&R Designs.  Here's a close-up-


In the center, the quilting goes out from the center of the flowers and imitates the lines of the flower.  A feather design was used in the border.

Next week, I'll show you what I am doing for the Mug Rug Swap I am participating in.

Monday, January 31, 2011

Nickel I Spy #2

Here's my Nickel I Spy #2 quilt.  Two down, about 10 to go.  I say about 10 to go because if it takes me long enough, some of our grandkids will be too old for an I Spy quilt.  This version is a little trickier to make if you don't have a large assortment of I Spy fabrics to choose from.  Each diagonal row is a certain color so you need to have the right amount of 5" charm squares for each row.  Another option would be to alternate light and dark rows of fabric instead of making each row a different color if you don't have enough different colors of I Spy fabrics.  I will probably have to do the same thing myself for one of my grandkids. 
Also, don't be afraid to mix in some other fabrics.  I used a couple of flannel I Spy fabric squares in this quilt.  Children like to feel the different textures of fabrics.

Even though I have been referring to diagonal rows, I did not construct this quilt in rows.  I used the same 9-patch construction that I have used in previous blog posts of my quilts.  There are nine 9-patch blocks in this quilt.  That's 81 nickels (5" squares).  It finishes at about 41"X41" which I think is a good size for a young child to drag around.

Nickel I Spy #2

I decided I wanted an allover quilting design for this quilt.  Linda of L&R Designs used a pantograph quilting pattern called  "Bubbles" and a variegated thread.  I love the way it turned out!  Here's a close-up-


For the back of the quilt, I used a fabric that I had purchased online to use in my I Spy quilts.  When I received the fabric, I realized that the motifs were too big for nickel squares.  That's one of the problems of ordering online. The next problem was that I had only ordered a yard and the quilt was 41"!  Sooo, I pieced the backing.  Here's what it looks like-


I was lucky enough to have two fabrics that I feel work well together.  So the backing has plenty of things for kids to spy with their little eye and I used up some of my fabric stash instead of buying more.  Well, at least I didn't buy any more for this quilt.